Friday, 22 November 2013

Christmas Glass Ornaments

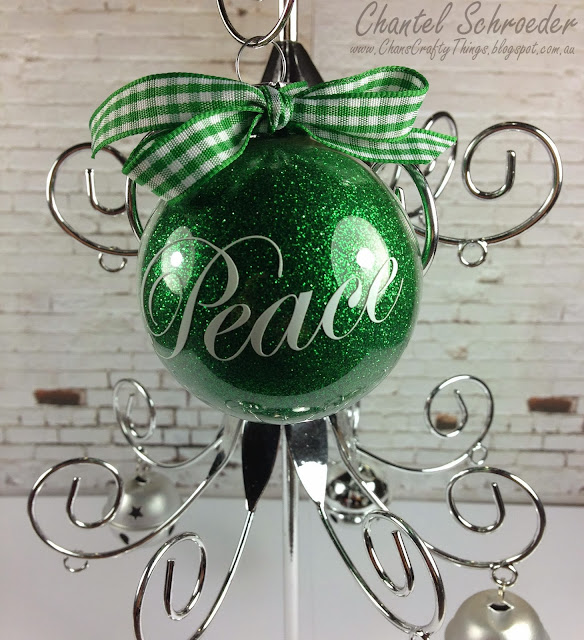
I finally decorated the glass ornaments I bought last year!  Yippee! 
It was my first time working with vinyl too!  The glitter was a lot of fun but I wanted to try something else too.  I filled the next one with fake snow and mixed in a bit of twine with the ribbon for a different look.  I personalised for my hubby. 
Boy this is fun... I think I might have to make a whole bunch more!  The possibilities with these are endless!

Thanks for stopping by!
 

Image Hosted by ImageShack.us


Rosette Christmas Tree

Here's a miniature Christmas tree I made for my desk at work. 

I used one of the files from the Christmas Ornament SVGCuts kit along with the rosette file from the Made in the USA kit and cut them out in different sizes.  I assembled all the rosettes first (but at an angle and not flat like you usually would when making a rosette) before I poked the dowel stick through them.  I glued each layer in place with a hot glue gun.

To make the star on top of the tree, I cut six stars from the Stars and Stripes kit, folded them in half and glued them together.  The base of the tree is made from the drum file in the Stanta's Visit kit with a piece of florist foam in it to hold the tree up.
I can't wait until I can put this one up in my office.  It's so cute...

Thanks for stopping by!
 

Image Hosted by ImageShack.us


http://www.svgcuts.com/affiliates/jrox.php?id=3640&jxURL=http://svgcuts.com/index.php?main_page=product_info&cPath=3&products_id=329
http://www.svgcuts.com/affiliates/jrox.php?id=3640&jxURL=http://svgcuts.com/index.php?main_page=product_info&cPath=47&products_id=266
http://www.svgcuts.com/affiliates/jrox.php?id=3640&jxURL=http://svgcuts.com/index.php?main_page=product_info&cPath=3&products_id=283

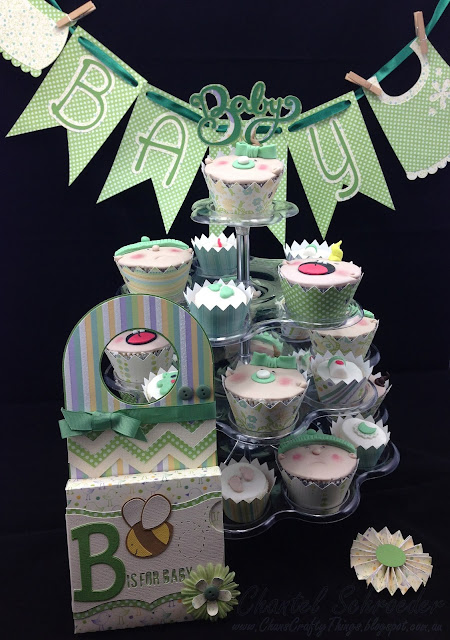
Baby Shower Cupcakes

So many baby showers lately... I made this display for a lady at work a little while ago and it was so much fun putting it all together!

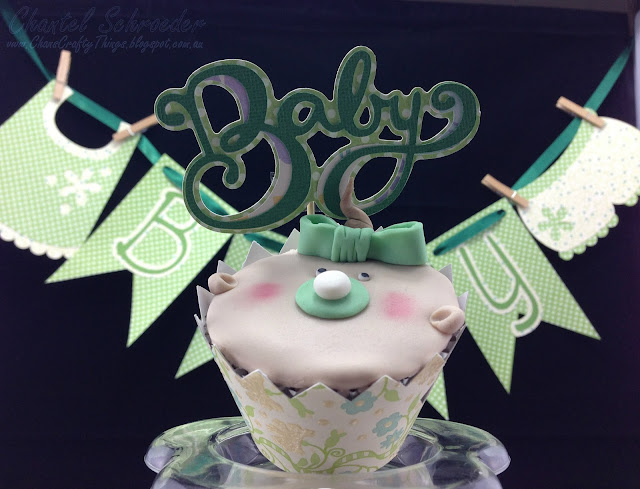
My friend who makes the most amazing cakes taught me how to decorate these adorable baby cupcakes.  I am so impressed with how they turned out - especially as it was my first go at decorating with fondant.  I just love the little screaming babies - too cute! 
  
I used a bunch of different files from SVGCuts and paper from the CWV Baby boy stack for this project.  The cupcake wrappers are from the Summer Street Carnival kit and the banner and rosettes are from the Made in the USA kit.      
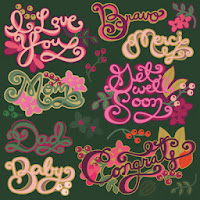
The "Baby" title on top of the cupcake tier is from the Smooth and Swirly Word Art collection - one of my favourites...

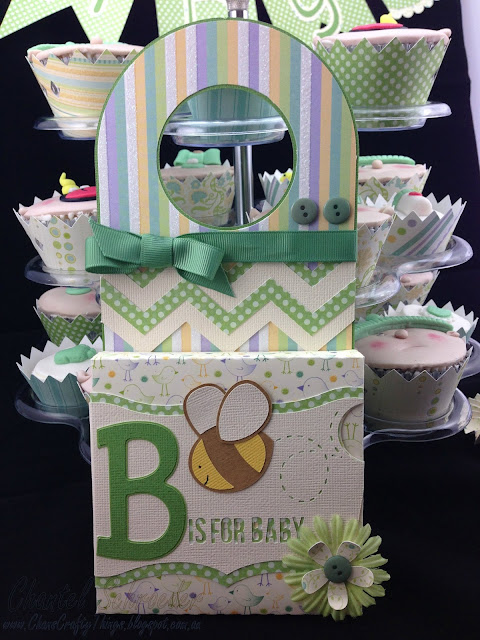
I combined the door hanger file and the Birthday bag file from the B is for Birthday kit to make the Baby door hanger before adding a couple of buttons, some Kaisercraft ribbon and flowers from my stash.
Here is a close up of the baby clothes.  So cute - and this file is FREE!  Yes, head on over to the SVGCuts page and click on their free designs section to find the Nora's Romper file.  They are too kind over there with all their amazing free files!  
Thanks for stopping by!
 

Image Hosted by ImageShack.us
 
  
http://www.svgcuts.com/affiliates/jrox.php?id=3640&jxURL=http://svgcuts.com/index.php?main_page=product_info&cPath=30&products_id=313
http://www.svgcuts.com/affiliates/jrox.php?id=3640&jxURL=http://svgcuts.com/index.php?main_page=product_info&cPath=47&products_id=266
http://www.svgcuts.com/affiliates/jrox.php?id=3640&jxURL=http://svgcuts.com/index.php?main_page=product_info&cPath=20&products_id=349http://www.svgcuts.com/affiliates/jrox.php?id=3640&jxURL=http://svgcuts.com/index.php?main_page=product_info&cPath=12&products_id=350

Saturday, 2 November 2013

Butterflies Galore

I came across the idea for this card on Pinterest quite a while back.  Unfortunately, I looked for it again since but just haven't been able find the original source to give credit.
Nonetheless, this is my take on the butterflies on the fence card. 

The base of the card was made with one sheet of 12x12 AC cardstock, cut in half (at an angle) and with two folds in different directions to create the three panels of the card.  I wasn't specific with the measurements - just wanted the back panel to be a little larger than the front. As I wanted the card to look like a fence, I printed a piece of paper from the All Wood digital collection from Miriam's Scraps and adhered it to the cardstock and cut to size. 

I then cut out a whole bunch of butterflies from various SVGCuts kits and collections and inked their edges before layering them all along the edge of the card.  As a final touch, I added some Kaisercraft pearls for their bodies.

Unfortunately, you'll notice that the third butterfly from the bottom is torn.  I should note that this didn't happen during cutting, but afterwards... I was in such a hurry when I lifted it off the cutting mat and ripped it as a result (note to self - be more careful next time!).   
 
At first, I thought I could get away with the broken butterfly but once I put it all together, you could still clearly see it.  
So, at the very last minute (and after I packed my camera away), I decided to quickly cut out another butterfly and replace it after all.  I just couldn't let it go... :).  Once I was done, I looked at it again and realised it was still missing something so I added a die-cut oval with a stamped Happy birthday sentiment to the front with a bit of twine.
Next time, I will try to leave myself a bit more time to take pictures of the finished product (not halfway through... lol).

Thanks for stopping by!
 

Image Hosted by ImageShack.us
 

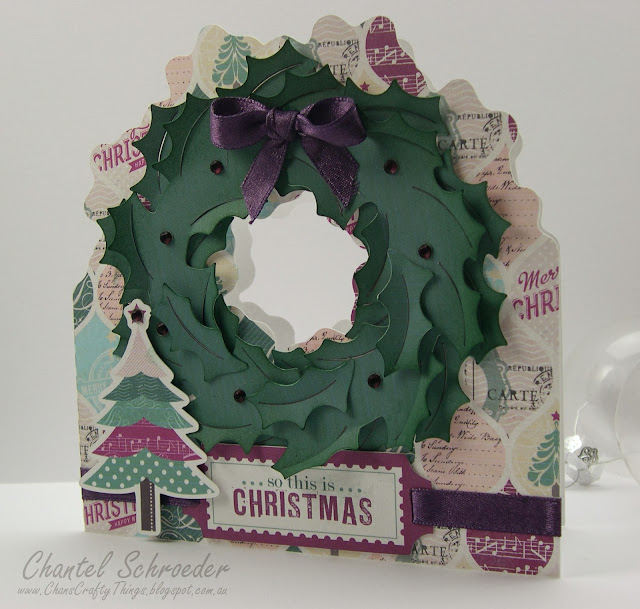
"Oopsie" Wreath Card

Today I am sharing my "Oopsie" Wreath Card... Here's the story...
 
I wanted to make the Wreath Card from the newest SVGCuts kit, Silent Night.  As you know I love using the print and cut feautre on my Cameo so I picked out some nice digital paper by CartaBella (So this is Christmas) and proceeded to fill all my pieces in the Silhouette DE program.  I thought the card would look really nice in this paper as it is very "Christmassy" with lots of different reds and greens.  There were also a few elements that I really liked so I thought I would print and cut them too and use them as embellishments for my card.
 
I then set my registration marks and sent my images to the printer.  But this is where it all went wrong.  For some reason, my printer decided that it didn't want to play along and as you can see, the lovely reds in the digital paper printed almost purple!  Not at all what I had in mind... Oopsie!!
I felt really frustrated when I first saw that the colours didn't print correctly but then I thought I might as well run with it and cut it out (probably just because I like to see my Cameo do it's magic).   

I assembled the card, added a couple of the digital elements I had cut out (which fortunately also printed in the wrong colours so it matched the rest of the card perfectly), a few rhinestones and some silk ribbon and voila... the strangest coloured Christmas card you'll ever see... lol!
 
Certainly not your traditional Christmas colours, I know, but strangely enough, I think I kind of like it...?


Thanks for stopping by!
 

Image Hosted by ImageShack.us


 http://www.svgcuts.com/affiliates/jrox.php?id=3640&jxURL=http://svgcuts.com/index.php?main_page=product_info&cPath=3&products_id=375