Showing posts with label Kaisercraft. Show all posts

Friday, 1 August 2014

Texture Paste Technique

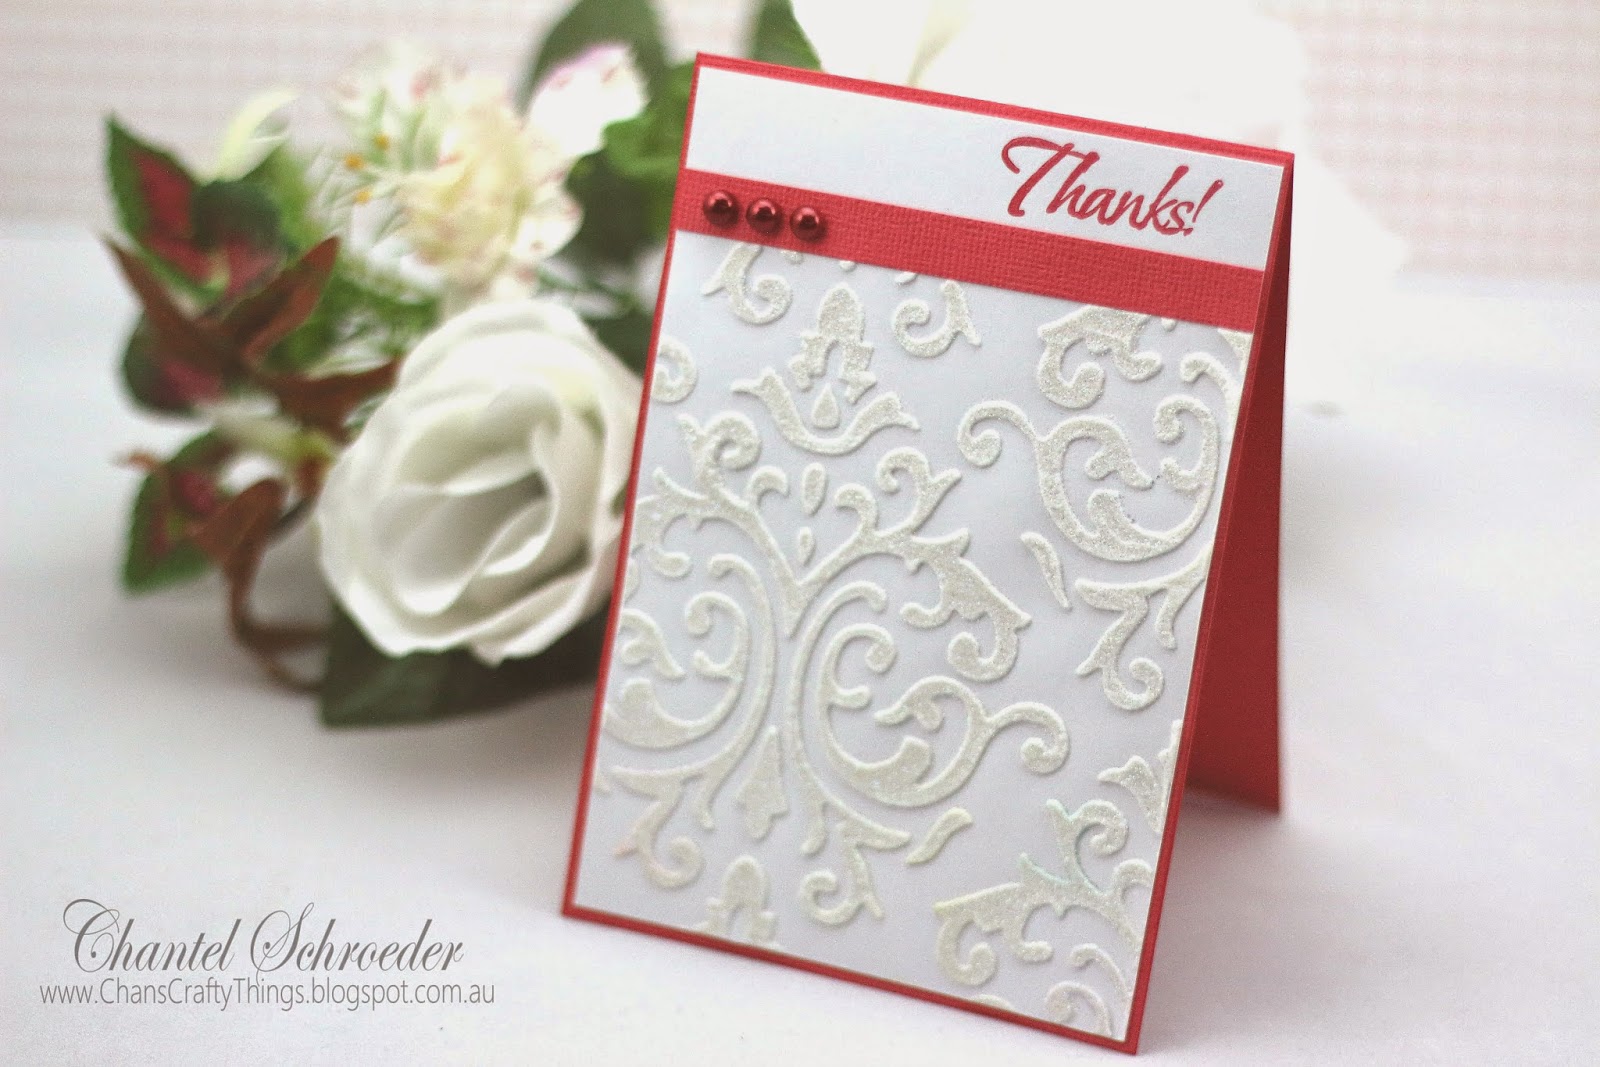
Hi there, just a quick post of a thank you card I recently made using a technique I saw on YouTube...


The video is by Jennifer McGuire (sorry, I looked for it again but couldn't find it to share the link) and she uses a stencil, texture paste and embossing powder to create a really cool embossed image for a card front.   So, following Jennifer's instructions, this is what I did:     

I used the 12' x 12' Damask stencil by Kaisercraft and placed it over a piece of plain white cardstock.  First I applied texture paste over the stencil and then carefully removed the stencil whilst the paste was still wet.  Then I covered the wet paste with Stampendous Kaleidoscope embossing powder and set it aside to dry for a few hours.  Once dry, I heat set the embossing powder with my heating tool.

I stamped the sentiment and added a thin strip of red cardstock with a few Kaisercraft pearls before adhering it to the card base.

The raised areas stand out so much and it looks really cool - especially with the Kaleidoscope embossing powder.  I think I'm in love with this technique and hope you like it too.  I just know I'll be using it quite often in the future.  

Thanks for stopping by!


Image Hosted by ImageShack.us

Saturday, 26 July 2014

Girly Dress Form

Hi there,

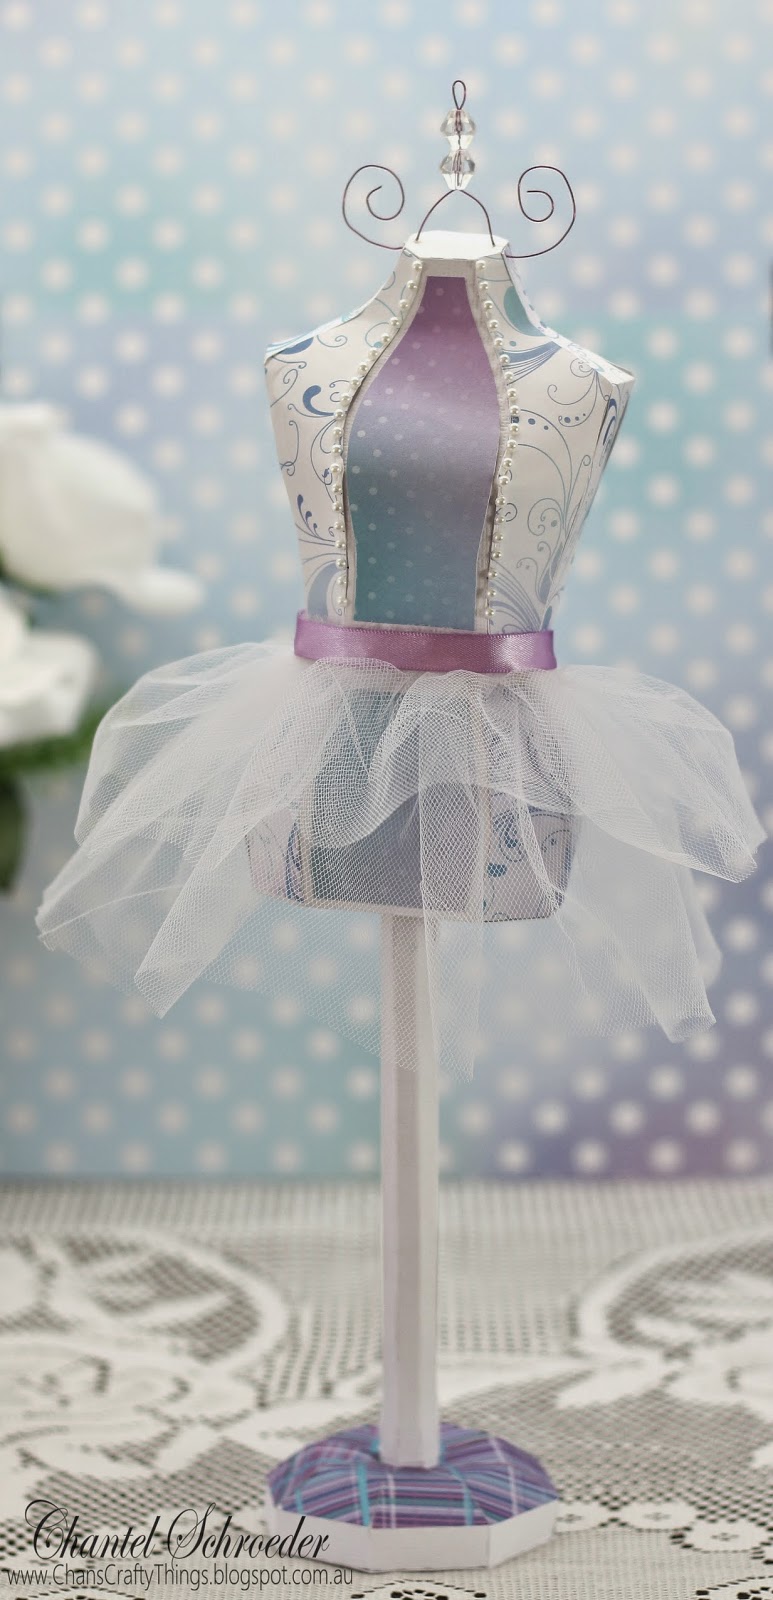
Today I am sharing a little gift that I made from my friend's crafty daughter.  She celebrated her eleventh birthday last week so I wanted to make her something really special.

I've been waiting for the perfect occasion to make the dress from from the Dress Shop SVG Kit and knew that this would be it... 

The paper is by Kaisercraft and I just love it on this dress form.  It's so soft and subtle - very girly and ladylike!  I added some white tulle around the waste and finished it off with a piece of satin ribbon and some pearls (also by Kaisercraft).

For something extra, I poked a couple of small holes in the neck and worked some purple wire through.  I like the little beads on top - gives it that final touch of "bling" that every girl needs. I hope you like it!


Thanks for stopping by!


Image Hosted by ImageShack.us

Sunday, 5 January 2014

Blossom Box and Thank You Card

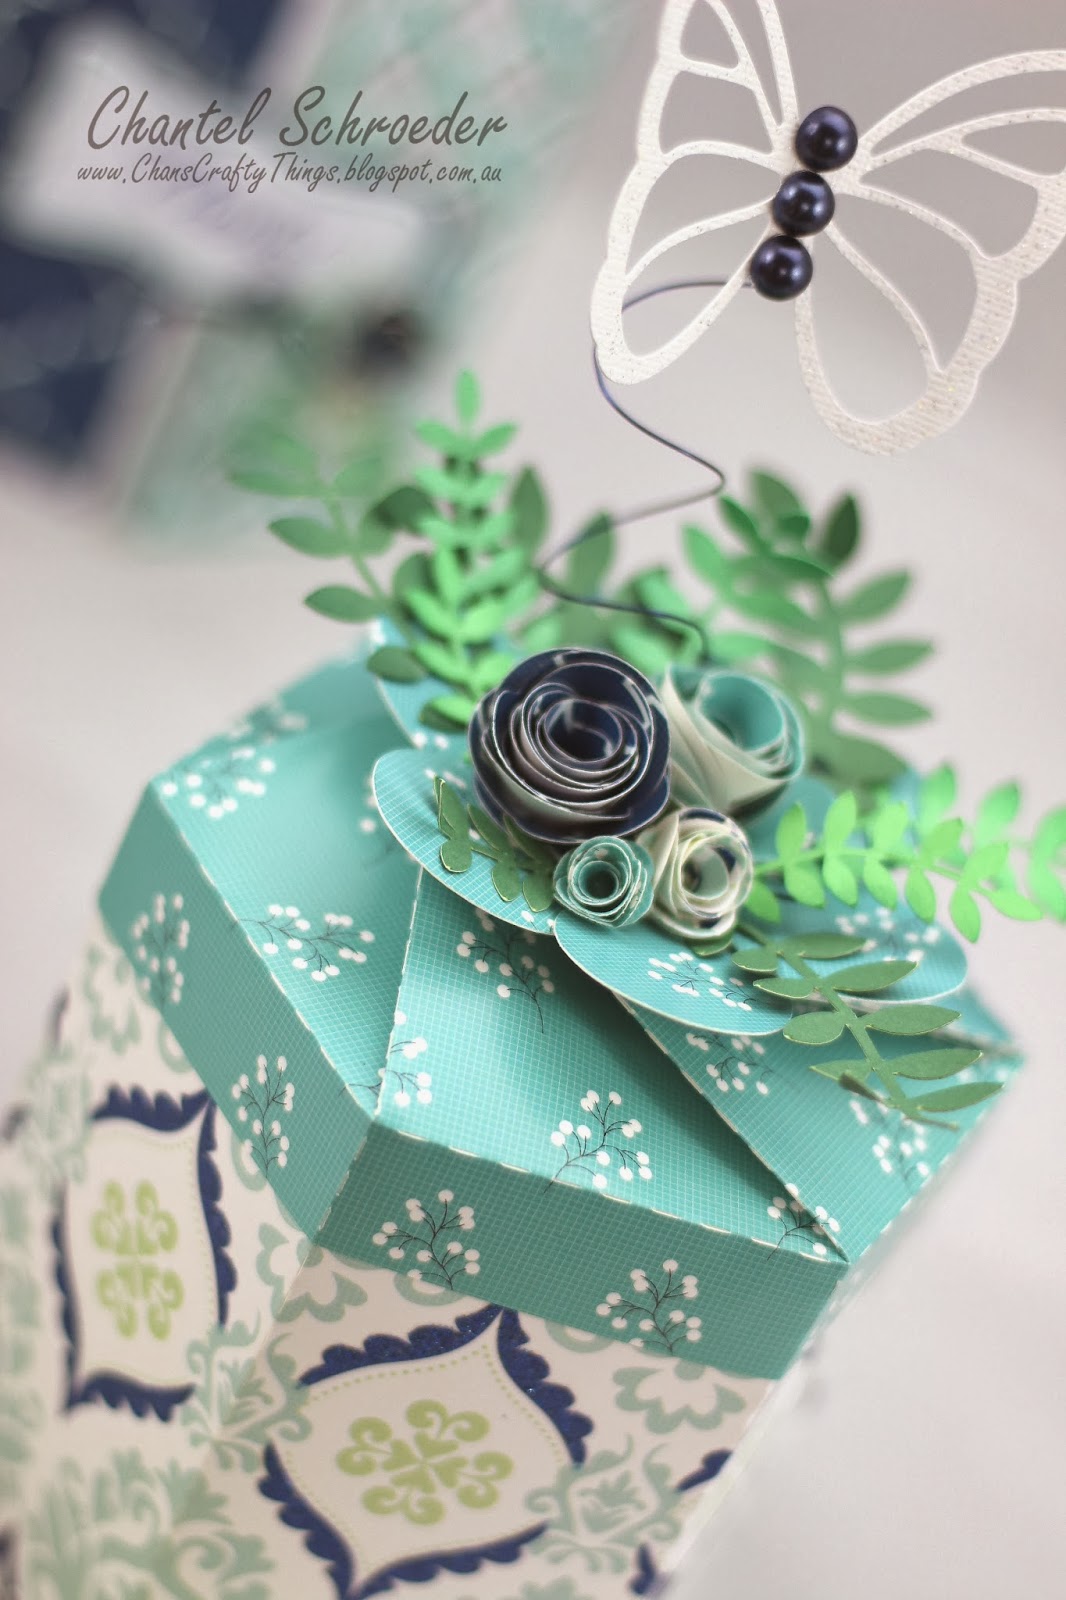
Today I am sharing a little box and matching card I made as a thank you gift for someone special... 
Can I just start by saying that I LOVE these papers!  it's from the DCWV Blue Citrus Stack, and it is just gorgeous!  The colours are so vibrant and I love that it has a combination of shiny and sparkly bits in the papers.  Best of all, it cuts like a dream in my Cameo!
 
Now for the other details... I used the Blossom Box file from the Gift Boxes SVG Kit and embellished it with some rolled roses and greenery from the Mothers Garden SVG kit.  The butterfly is from the High Skies SVG kit (without the vellum) and the navy pearls are from Kaisercraft. 
The card is also from the High Skies SVG kit but instead of the anchor, I added a label from the Mothers Garden SVG kit which I stamped and heat embossed.  Again, I just added some rolled roses and greenery to finish it off.
I'm really pleased with how this gift set turned out and can't wait to give it to the recipient. I'm sure they are going to love it!


Thanks for stopping by!


Image Hosted by ImageShack.us
 

http://www.svgcuts.com/affiliates/jrox.php?id=3640&jxURL=http://svgcuts.com/index.php?main_page=product_info&cPath=29&products_id=358
http://www.svgcuts.com/affiliates/jrox.php?id=3640&jxURL=http://svgcuts.com/index.php?main_page=product_info&cPath=30&products_id=347

http://www.svgcuts.com/affiliates/jrox.php?id=3640&jxURL=http://svgcuts.com/index.php?main_page=product_info&cPath=44&products_id=306

Sunday, 15 December 2013

His and Hers gift set

Today I am sharing a gift set I made for a couple of my friends who celebrate their birthdays a few days apart. 


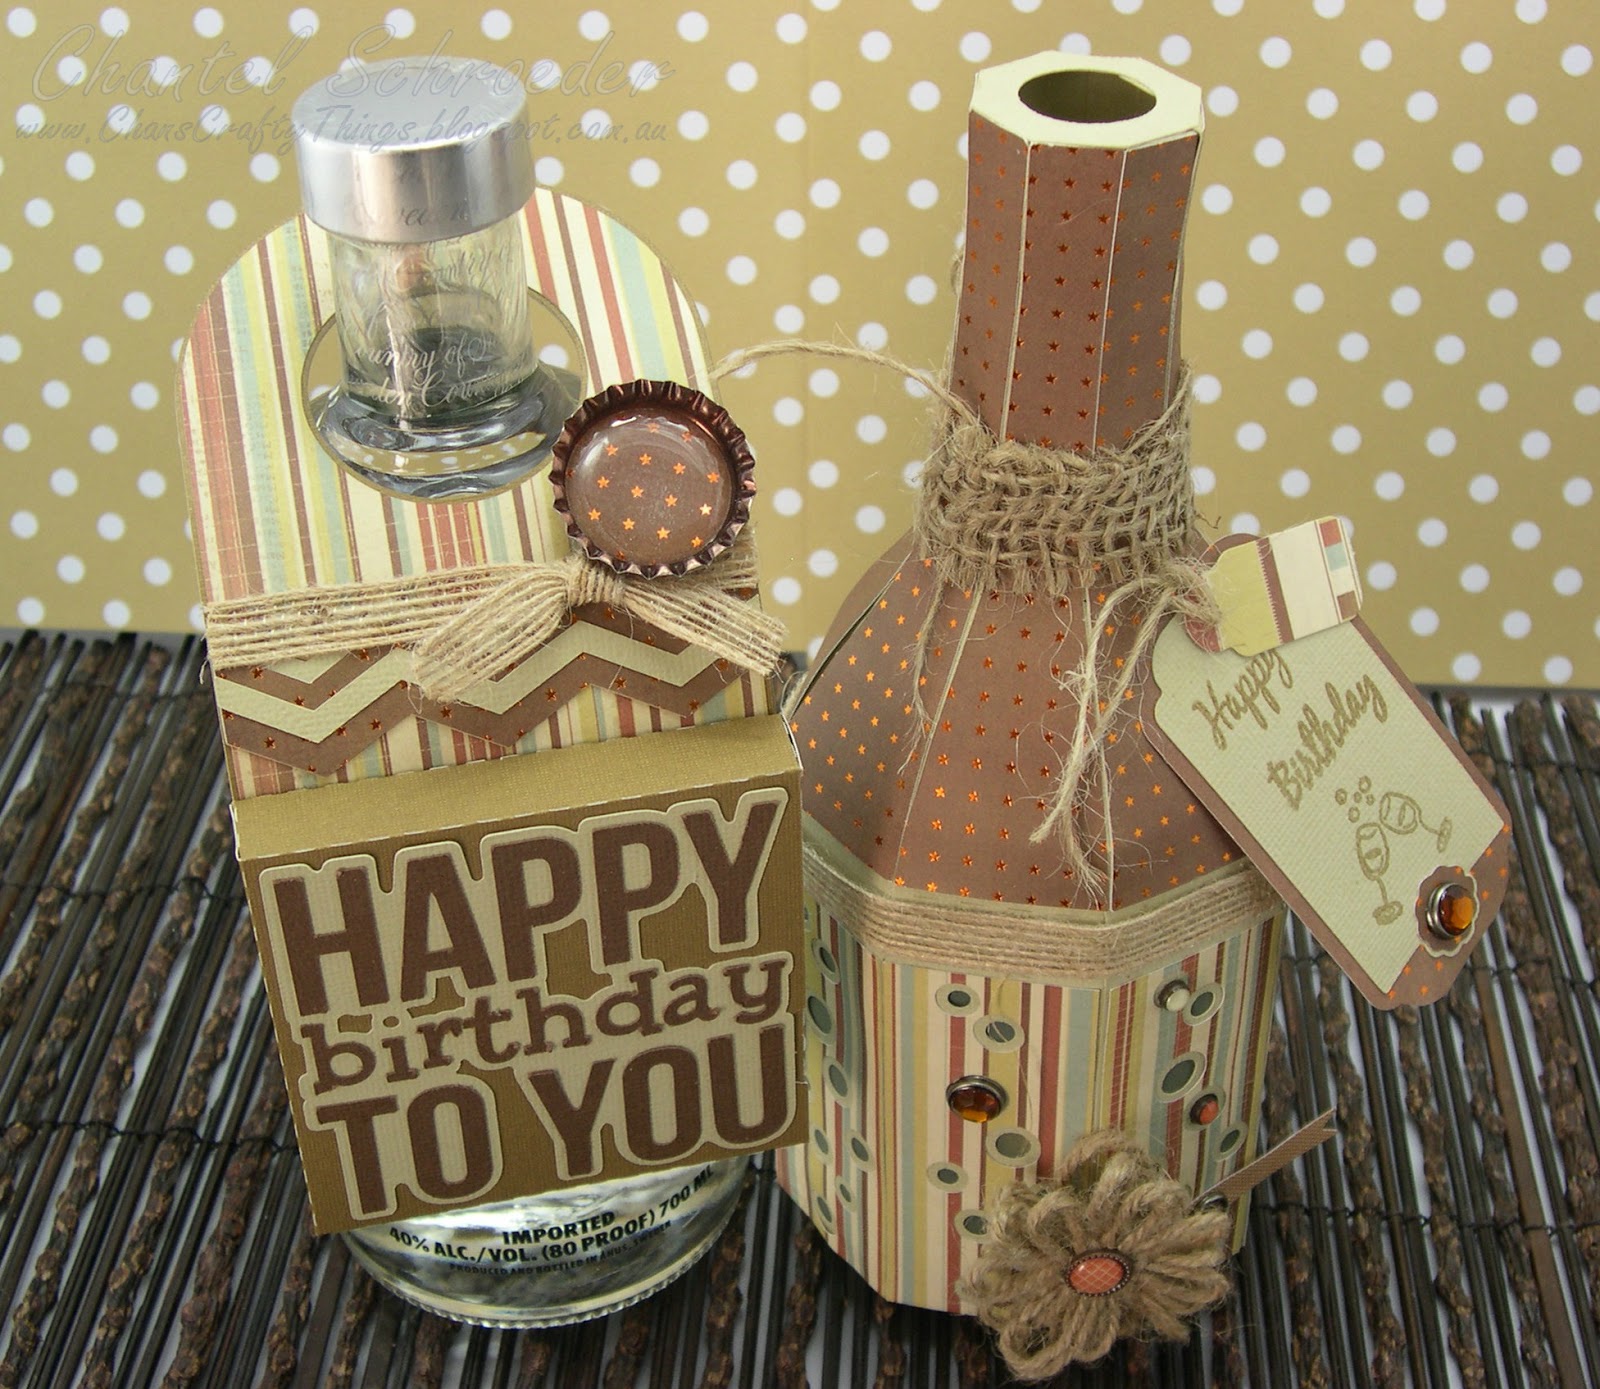
I don't know about you but I always find it quite difficult to make or buy gifts for guys.  Fortunately, for me, SVGCuts always comes to the rescue with their amazing kits. So, for "His" gift, I was able to dress up my friend's favourite bottle of happy juice by using the door hanger file from the B is for Birthday kit with some "boy" paper from Kaisercraft. I also made my own bottle cap embellishment by punching out a circle from matching paper and the covering it with an epoxy dot. I thought this would be more suitable than a flower or a ribbon...

For "Hers", I made the champagne bottle from the New Years Eve SVG kit and embellished it with burlap strips, ribbon and flowers.  I stamped the happy birthday tag with a freebie I received when I purchased a scrapbooking magazine.  I thought it was perfect for this occasion.

As a final touch, I added a whole bunch of Teresa Collins vintage brads.  These are my favourite brads of all time and I've had them in my stash forever - just waiting for the "perfect" project to use them on.
Here's the bottle with the top off - revealing the treats I put inside... my friend's favourite chocolates...


Thanks for stopping by!
 

Image Hosted by ImageShack.us
 
   
http://www.svgcuts.com/affiliates/jrox.php?id=3640&jxURL=http://svgcuts.com/index.php?main_page=product_info&cPath=20&products_id=349

Friday, 18 October 2013

Happiness is not a destination...

My friend's (very crafty) daughter received an invitation to a "Paris" party the other day.  Whilst shopping around for a birthday gift, they came across one of those inspirational hanging plaques with a beautiful picture of the Eiffel Tower on it.
When I saw the picture, I just new that we needed to make the Eiffel Tower box from the Amelie's Accessories SVGCuts Kit to go with it. 
So, my crafty little helper (Keyra) and I set out to put something together for the birthday girl quickly.  This is what we came up with...


The paper is from a Kaisercraft stack I have in my stash.  I think Keyra did an amazing job at inking all the edges to match the colours in the plaque.  It was also the first time she had a go at using the Big Shot to dry emboss, which was very exciting!

The little birthday tag with  baker's twine was Keyra's idea - the perfect touch to finish it off nicely, don't you think?
I just love this little box. I was really surprised how quick it was so assemble - and everything was done in no time (especially as there were 4 hands instead of 2 thanks to my crafty friend)!


Thanks for stopping by!


Image Hosted by ImageShack.us


Purple, Orange and Black Witch's Hat

Today I'm sharing my Halloween card I made for the monthly challenge at Scrapbook Boutique.   This month's challenge is to submit a project using the theme 'Halloween' or using the colours Purple, Orange and Black. 
 
I decided to do both...  So for my entry, I made this cute Witch's Hat card from the Haunted Hemlock Cards SVG Kit.  I was pleased with how my card turned out so I decided to enter it in the Halloween Hootery challenge over at Paper Issues as well...  


I used papers from the Bewitched stack from DCWV (which I picked up at Spotlight for half price!) as well as some black AC Cardstock for the main part of the hat.  
I inked the edges of all the individual pieces to give the final product a bit of a distressed look. I then added the flower (which I built up using Pop-Dots for added dimension) and then added a few pearls from Kaisercraft.


This is the picture that Scrapbook Boutique posted as inspiration for the challenge ... Aren't these cupcakes just the cutest?


Thanks for stopping by!
 

Image Hosted by ImageShack.us


Saturday, 20 July 2013

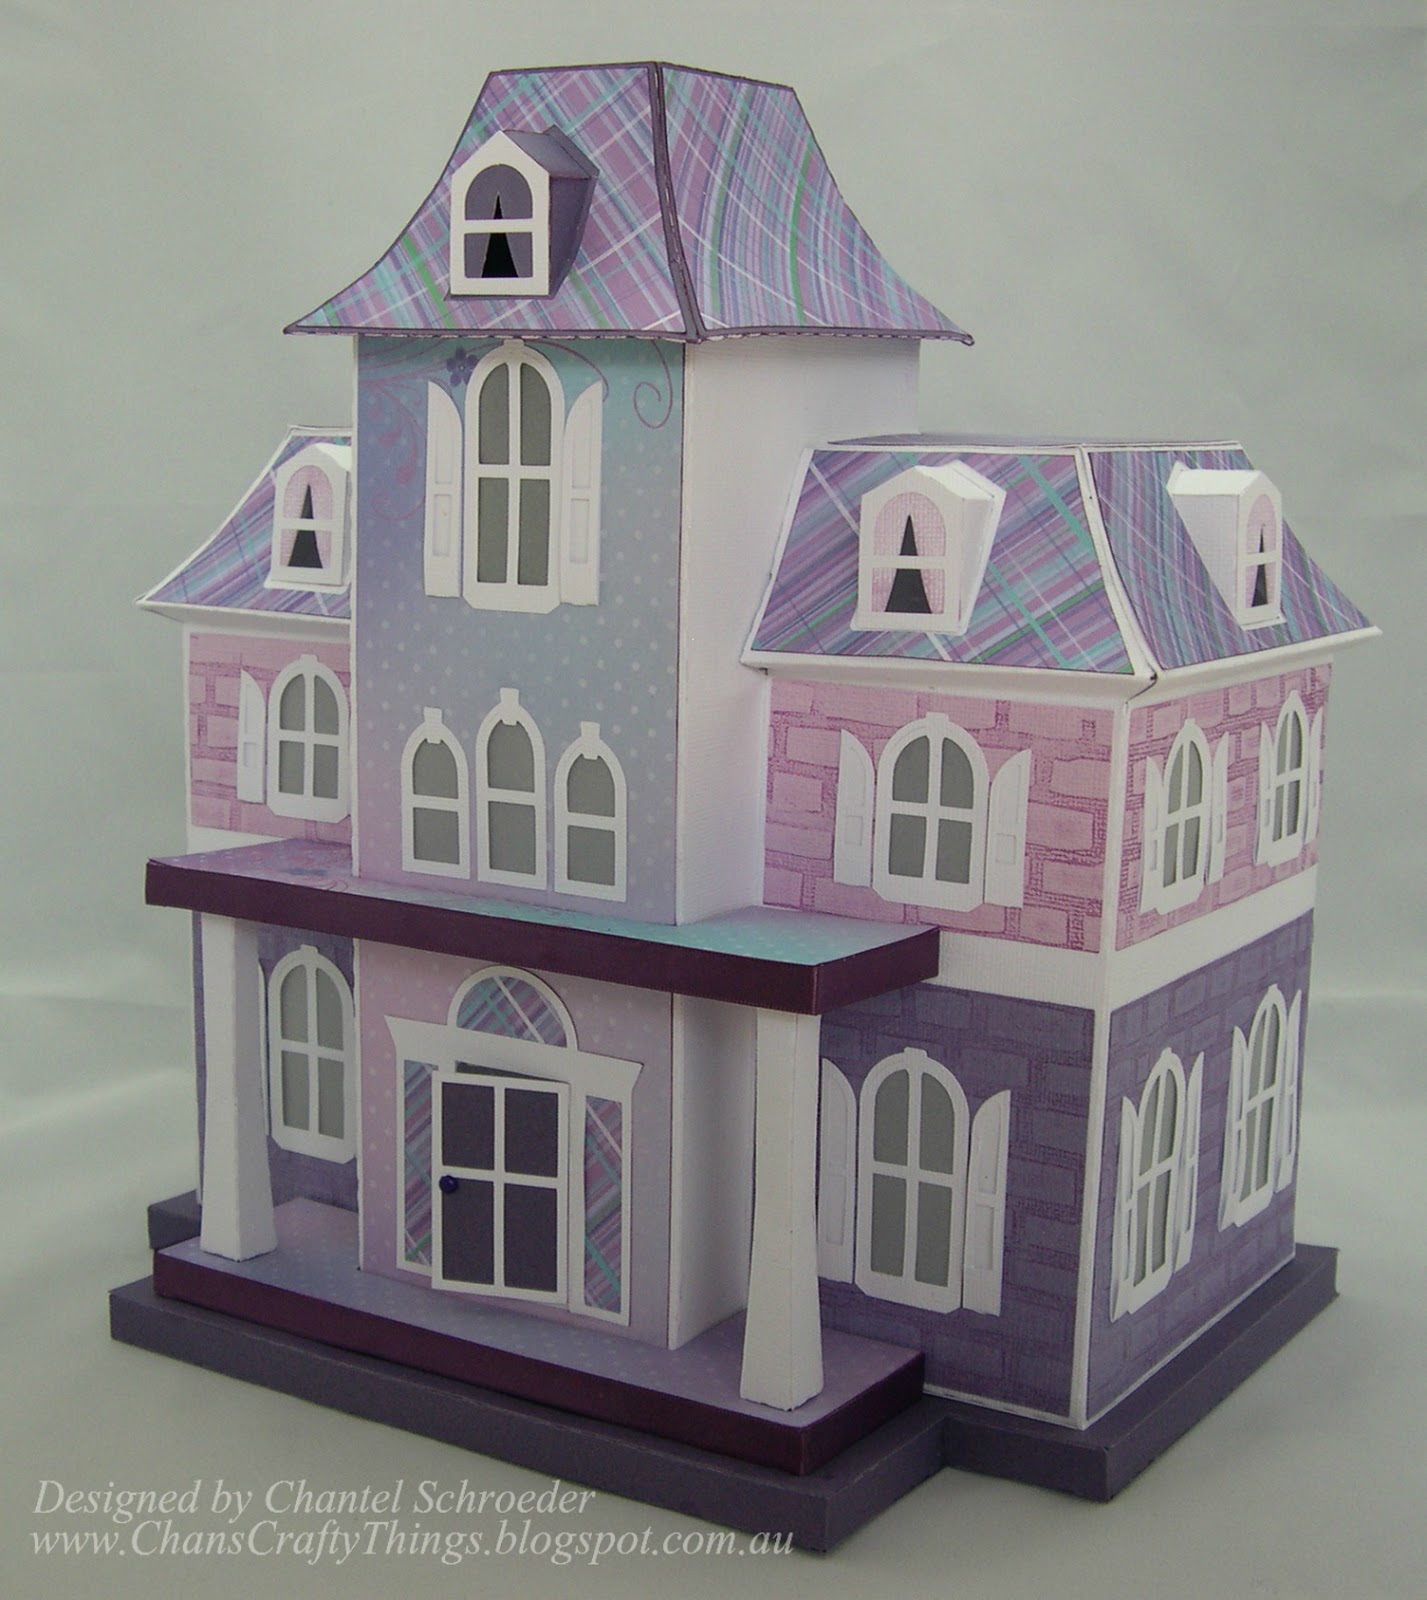
Doll House Mansion

Hi everyone, today I'm sharing a birthday gift I made for my friend's 10 year old daughter a couple of weeks ago. 
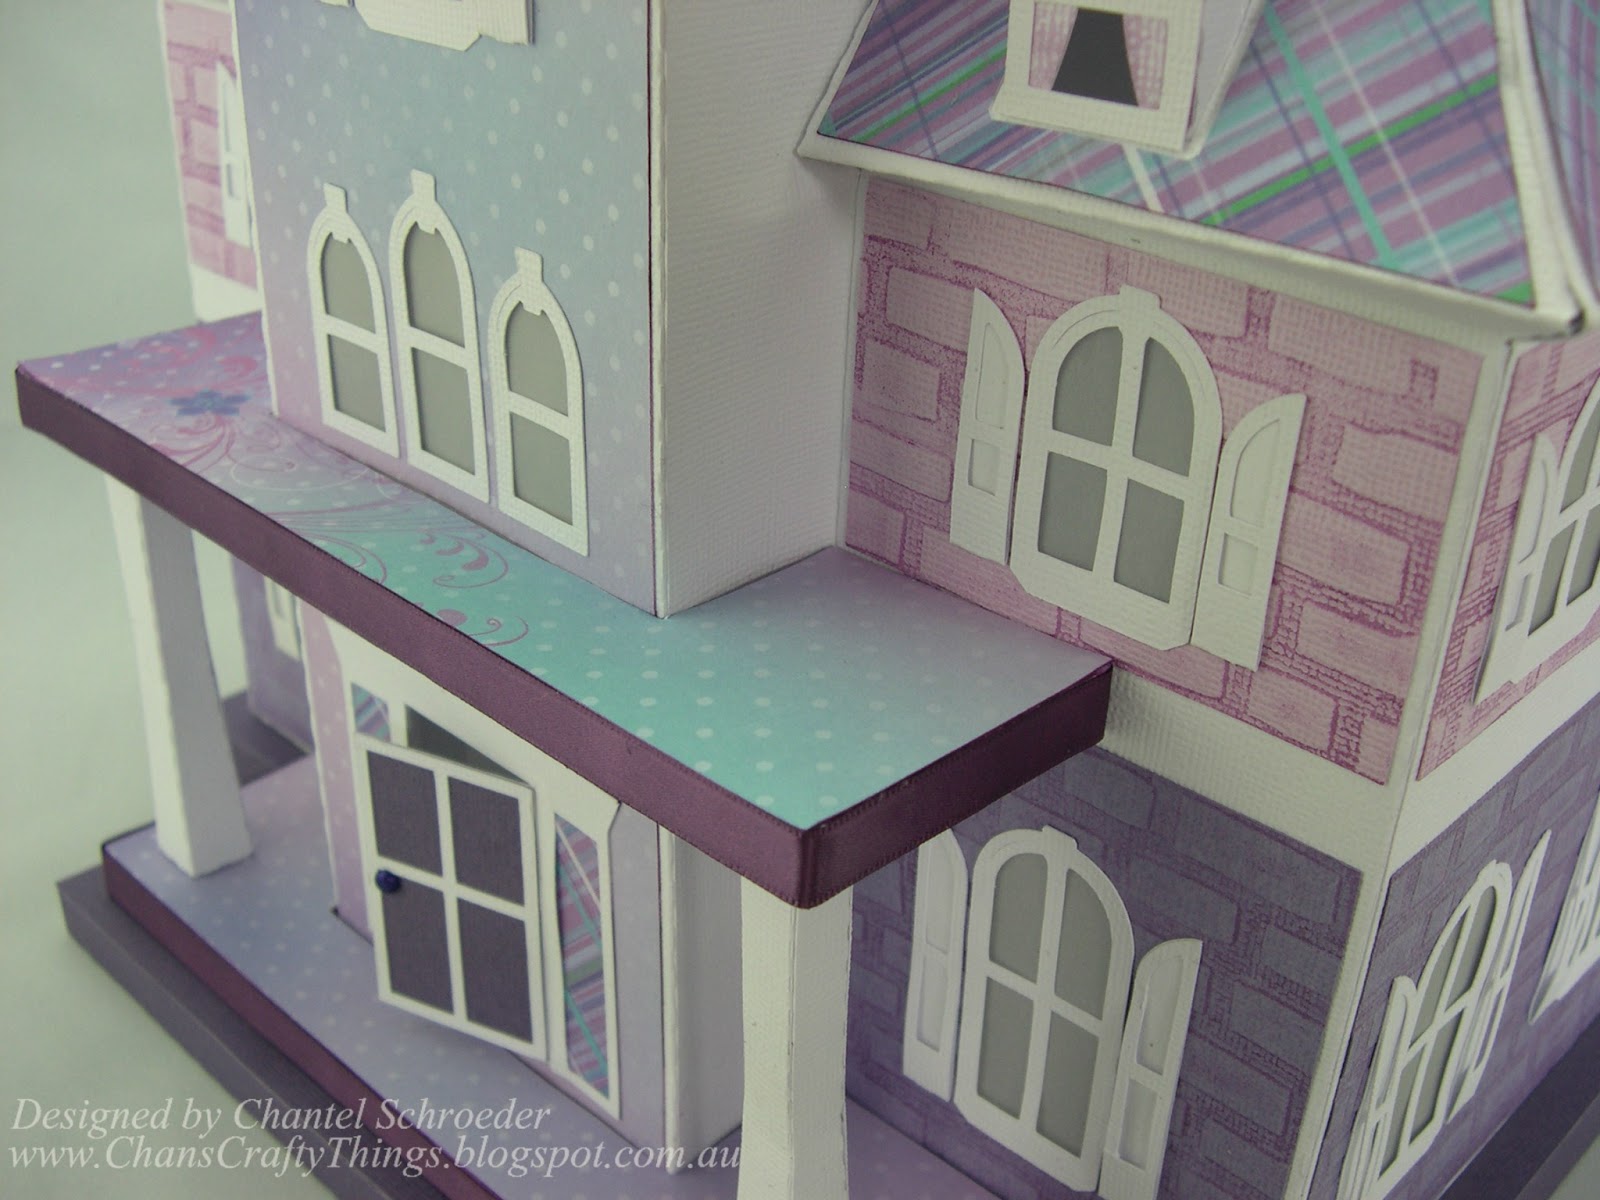
The file is from SVGCuts Maple Manor kit.  The kit has a Halloween theme however, as with all SVGCuts files, it can easily be transformed to suit any theme, occasion or season with different types of papers and embellishments.   
I chose patterned papers from the Kaisercraft Magic Happens collection and used AC cardstock for the solid colours.  To add some texture, I used a brick embossing folder, inked the raised edges with Kaisercraft Aubergine ink and then ran it through my BigShot.  With this technique, I was able to get colour on the "grout" only, which makes the embossed "bricks" stand out more.   

At the back of the house there is a flap that opens and the top tower also comes off so it was easy to add few LED tealights.  That said, I had to cut through the front door as I wanted it to open as well.  The picture on the right below is of the birthday girl (Keyra) and the doll house with the lights on - it really looks like someone's home doesn't it...? 
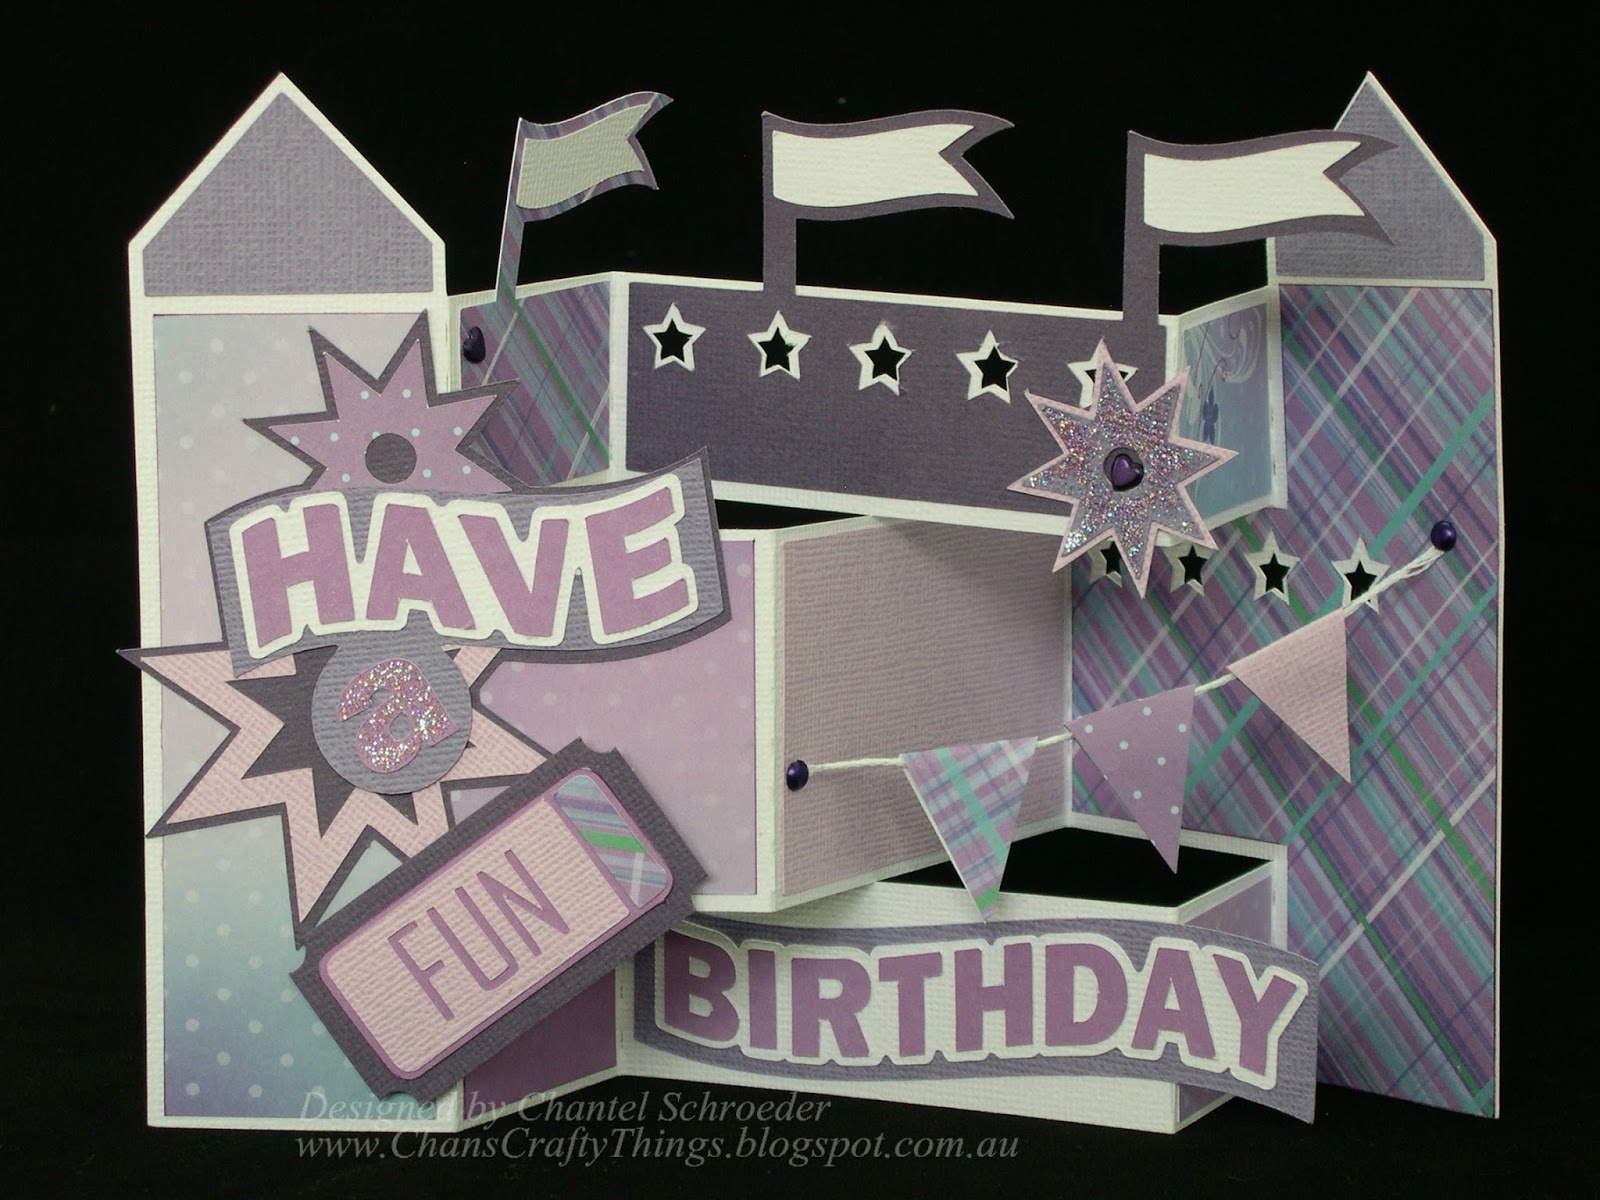
I also made a coordinating birthday card out of the same paper collection.   The card file is from the Summer Street Carnival kit.   
Thanks for stopping by!
 

Image Hosted by ImageShack.us

Sunday, 14 July 2013

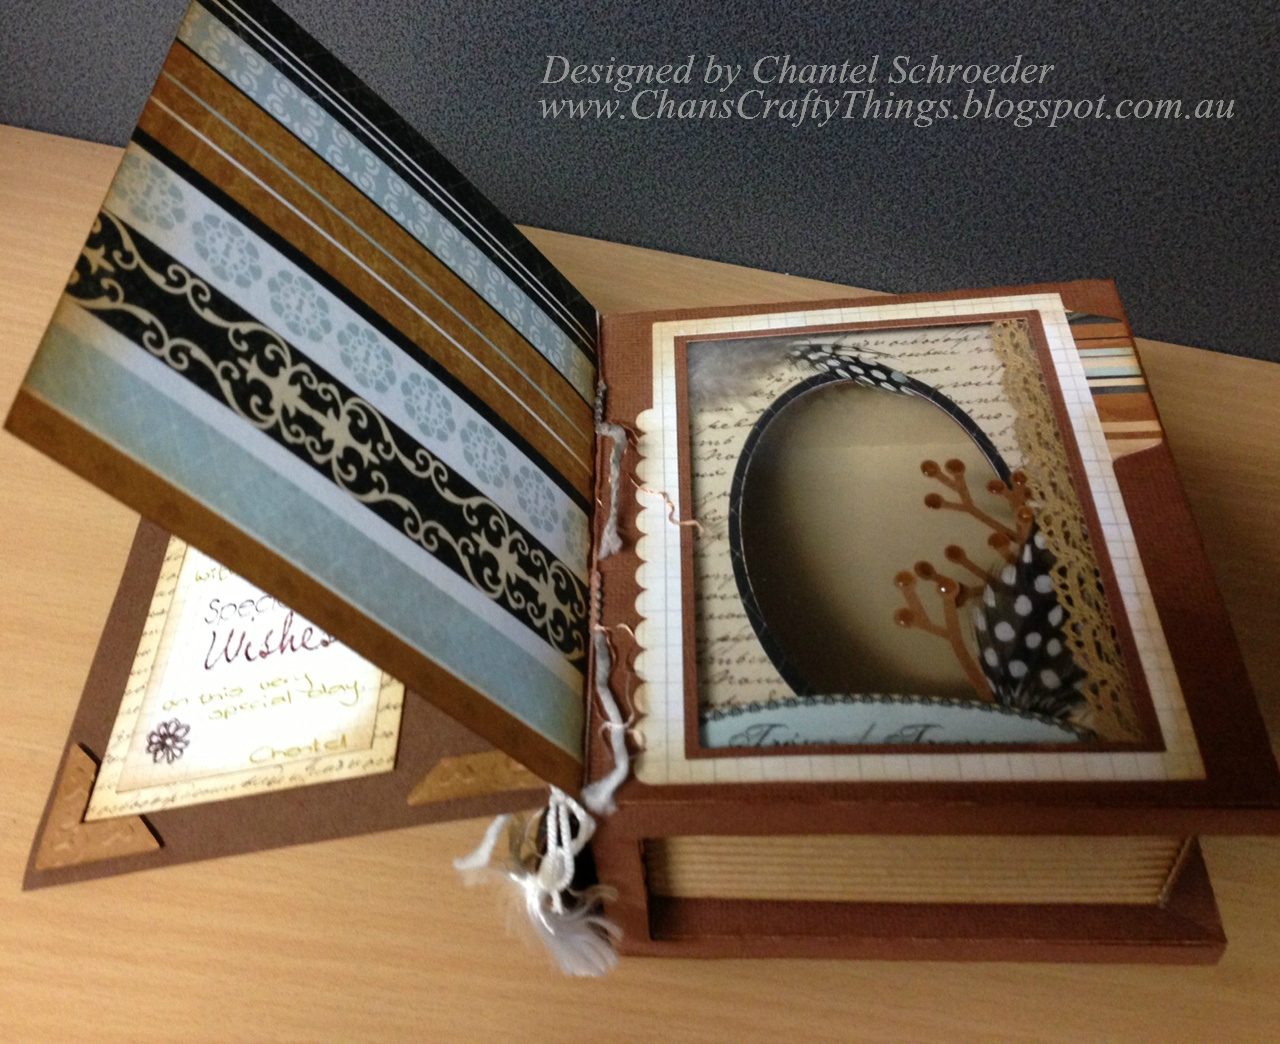
Antique Book

When I saw Thienly Azim's All in one Valentine it really inspired me to make one of my own. 

I needed a gift for a lady at work and wanted to make something to hold a few of her favourite chocolates.  So, I set off to get the Sprits of Christmas Past kit from SVGCuts and commenced the search for the perfect paper.  I landed on the Le Chateau collection from Kaisercraft and started to cut with my ever so trusty Cameo.  This is what I ended up with...
I added some corners which I found at the Dollar and Sense shop and then added a bird from Kaisercraft with a punched out flower, a pearl and a feather.
This is the inside - It slides out like a match box so I was able to put the chocolates inside.
Good thing about this is that it can be used for storing photo's or other memorabilia after all of the chocolates are gone...


I also made a little "bookmark" tag for the book which I used to add a message.   I just loved working on this project - thank you so much to the very talented Thienly Azim for the inspiration!

Thanks for stopping by!
 

Image Hosted by ImageShack.us