
Hi everyone,
No matter how well I plan, I always seem to need a few more cards in the last days just before Christmas. This year of course was no different:)
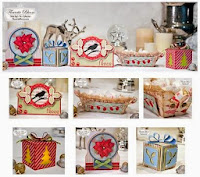
So, if you're anything like me and still need a few last minute cards, why not try one of these cute little snow globe cards that I made for my latest Fleurette Bloom DT project?

Isn't it adorable? Well, not only is the snow man super cute, but what I love most about this card is that I was able to cut all the pieces (apart from the snowman) out of ONE piece of 12' x 12' cardstock. Isn't that awesome?
How did I do it you may ask? Well, here's the scoop:
I used the Snow Globe card from the Holly Days Boxes and Cards Kit/Collection and imported all the required pieces into my software. I then drew squares around the pieces and filled them with papers from Fleurette's New Merry and Bright Coordinating Paper Pack. Here's a snapshot of the layout in my software:

Before sending it to my printer, I ensured that all the outlines where set to no colour and I also set my cut lines at the same time. By doing it this way, you will not only be able to see where your pieces are in the cut window, but you'll also be sure to get clean cuts with the print and cut feature. This is such a good trick as your cuts will always look perfect even if the printer calibration is slightly off.
Next I imported the Snow Man SVG Cut File and Printable and sized him down a touch so that he would fit into the snow globe. Once all the pieces were cut out, I assembled him as usual and gave him a cute Peachy Keen stamped face which I coloured with watercolour pencils.

Finally, to make the "glass" for the snow globe, I cut an acetate circle slightly larger than the center of the globe piece. I used Glossy Accents to adhere the acetate onto the back of the top snow globe piece. I then added some dimensional foam all around the back of the globe piece and put some fake snow in it before I adhered it onto the snow globe base.
A touch of ribbon and viola - one super cute snow globe card ready in time for Christmas!
Design tip: Now that you've already designed the card in your software, why not make a few more? By simply clicking on each block and filling it with different digital paper, you can make more cards with entirely different looks in no time!
I hope that you've enjoyed my project and that the tips and tricks will assist you when you make some of your own. If you do, I would love to see so please do share on my Facebook page or on Fleurette Bloom's page.
Thanks for stopping by!


No comments:
Post a Comment
I would love to hear from you - please leave a comment below.